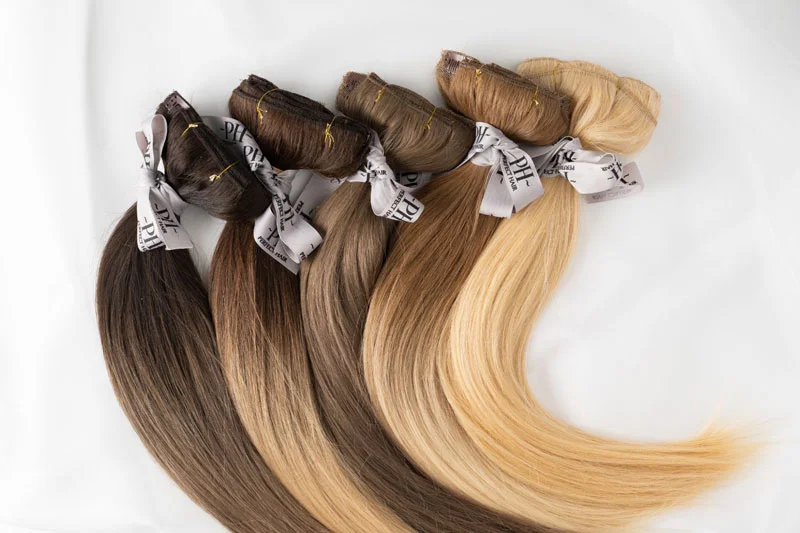
Welcome to the ultimate “Step-by-Step Guide: Applying Clip-in Extensions Easily & Effectively.” Whether you’re seeking to add volume, length, or a splash of color to your hair without a long-term commitment, clip-in extensions are your go-to solution. This comprehensive guide will walk you through each step, ensuring you achieve a flawless look every time. Say goodbye to costly salon visits and hello to DIY elegance with our straightforward, easy-to-follow instructions. Perfect for beginners and seasoned beauty enthusiasts alike, our guide will empower you to transform your hairstyle effortlessly. Let’s get started!
Why Clip-in Extensions Are a Game-Changer
Clip-in hair extensions have gained immense popularity for their ease of use and versatility. Unlike permanent extensions that require professional installation and maintenance, clip-ins allow you to change your look as often as you like without the long-term commitment. Whether you’re prepping for a special event or simply want to switch things up for the day, clip-ins can help you achieve a polished and natural look with minimal effort.
What sets clip-ins apart is their ability to enhance your hairstyle without damaging your natural hair. Because they don’t involve adhesives, heat, or chemicals, clip-ins are safe for all hair types. They’re also reusable, making them a cost-effective beauty investment. However, achieving a flawless result depends on proper application, and that’s where this guide comes in.
Preparing Your Hair for Clip-in Extensions
Washing and Detangling Your Hair
Before you start, it’s essential to ensure that your hair is clean and tangle-free. Washing your hair with a lightweight shampoo and conditioner removes excess oil and product buildup, which can affect the grip of the clips. Avoid heavy conditioners or leave-in products, as these can make your hair slippery and reduce the extensions’ hold.
Once your hair is clean, use a wide-tooth comb or detangling brush to remove knots. Smooth hair creates the perfect foundation for clip-ins, ensuring a secure and natural look. If your hair is prone to frizz, a light smoothing serum can help tame flyaways without compromising the clip’s grip.
Sectioning Your Hair for Easy Application
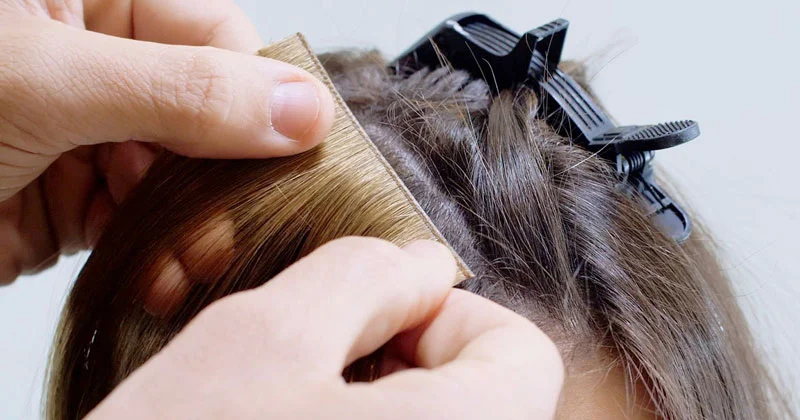
To apply clip-in extensions effectively, sectioning your hair is key. Use a tail comb to create horizontal parts, starting at the nape of your neck and working your way upward. Secure each section with hair clips to keep it out of the way. By creating neat, even sections, you’ll make the application process more manageable and ensure that the wefts blend seamlessly.
Tools You Need for Applying Clip-in Extensions
Hair Clips and Comb
A set of sturdy hair clips and a fine-tooth or tail comb are your best friends during the application process. The comb helps create precise sections, while the clips keep your hair organized and out of the way as you work.
Optional Styling Tools
Depending on your desired look, you may want to have a curling iron, flat iron, or hairdryer on hand. These tools can help blend your natural hair with the extensions for a cohesive finish. Always use a heat protectant to minimize damage to both your hair and the extensions.
Step-by-Step Guide to Applying Clip-in Extensions
Step 1: Start with the Bottom Section
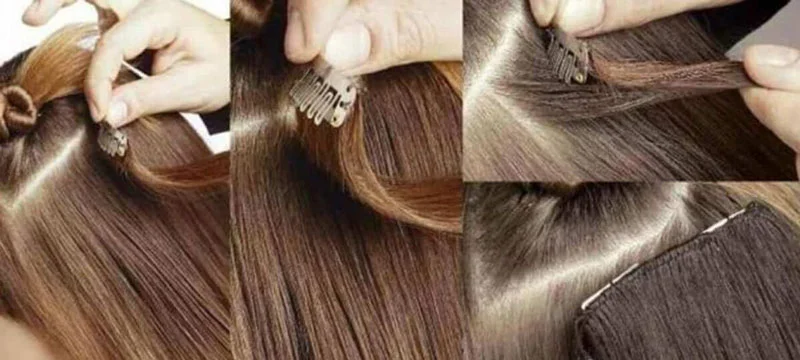
Begin by parting your hair at the nape of your neck. Clip the upper layers out of the way and leave a thin section of hair down. Select a small weft of clip-in extensions and snap open the clips. Position the weft just below the part line, ensuring it’s close to your scalp but not pulling tightly. Gently press the clips closed to secure the weft in place.
Step 2: Work Your Way Upward
Continue creating horizontal sections, moving upward toward the crown of your head. Attach wider wefts to cover more surface area, saving the narrowest pieces for the sides. Pay attention to the placement of each weft to avoid gaps or uneven coverage. For a natural look, position the clips slightly away from your hairline and ears.
Step 3: Blend for a Seamless Finish
Once all the wefts are in place, release the clipped-up sections of your hair. Use your fingers or a wide-tooth comb to blend your natural hair with the extensions. This step ensures that the clips remain hidden and the extensions look like a natural part of your hairstyle. If necessary, use a curling or flat iron to style your hair and the extensions together for a uniform appearance.
Styling Tips After Applying Clip-in Extensions
Curling for a Cohesive Look
Creating soft waves or curls can help blend the extensions with your natural hair. Use a curling iron with a medium barrel size to achieve a loose, romantic style. Alternate the direction of the curls for a more natural effect, and finish with a light-hold hairspray to set the look.
Straightening for a Sleek Finish
If you prefer a sleek and polished appearance, straighten your natural hair and the extensions together. Use a flat iron to smooth out any inconsistencies, ensuring a seamless transition between your hair and the extensions. Avoid excessive heat to prevent damage.
Using Hair Products to Hold the Style
Once you’ve achieved your desired look, apply a small amount of serum or styling cream to tame flyaways and add shine. Avoid heavy products that can weigh down the extensions or make them appear greasy.
Read more: Styling Ideas for Clip-in Extensions
Common Mistakes to Avoid When Applying Clip-in Extensions
While applying clip-in extensions is straightforward, there are a few common pitfalls to avoid:
- Uneven Placement: Ensure that the wefts are evenly spaced to prevent noticeable gaps.
- Using Too Many Extensions: Overloading your hair with too many wefts can create bulk and make the extensions look unnatural.
- Poor Blending: Take the time to blend your natural hair with the extensions, especially around the crown and sides.
Removing Clip-in Extensions Safely
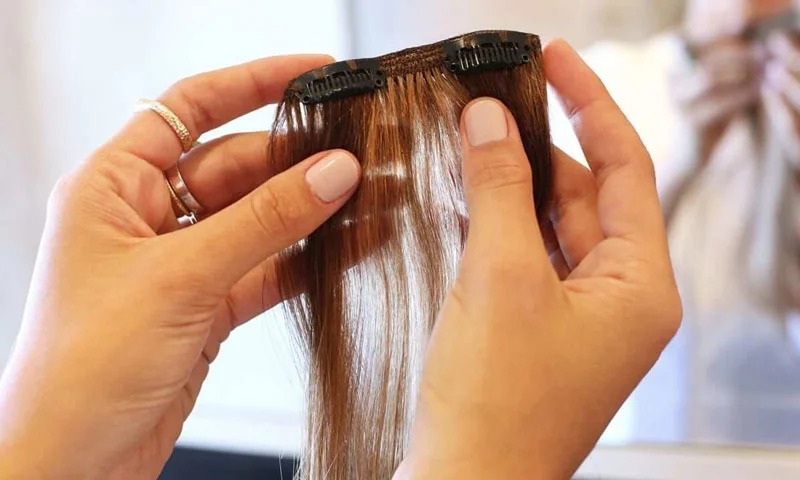
At the end of the day, it’s essential to remove your clip-in extensions gently to avoid damaging your natural hair. Start by unclipping the wefts from the top down. Hold the base of each clip as you open it to prevent pulling on your roots. Once all the extensions are removed, brush your hair to detangle any knots.
FAQs About Applying Clip-in Extensions
Can I Apply Clip-ins Myself?
Absolutely! Clip-in extensions are designed for DIY use. With a little practice, you can achieve professional-looking results at home.
How Long Does It Take to Apply Clip-in Extensions?
The process typically takes 10 to 20 minutes, depending on your experience and the number of wefts you’re using.
Can I Sleep with Clip-in Extensions?
It’s not recommended to sleep with clip-ins, as this can cause tangling and strain on your natural hair. Always remove them before bed to maintain their quality.
Conclusion
Applying clip-in hair extensions is a simple and effective way to elevate your hairstyle for any occasion. By following this step-by-step guide, you can achieve a flawless and natural look that enhances your confidence. With the right tools, techniques, and a bit of practice, you’ll be a pro at using clip-ins in no time. Ready to transform your hair? Grab your favorite set of clip-in extensions and start experimenting today!
