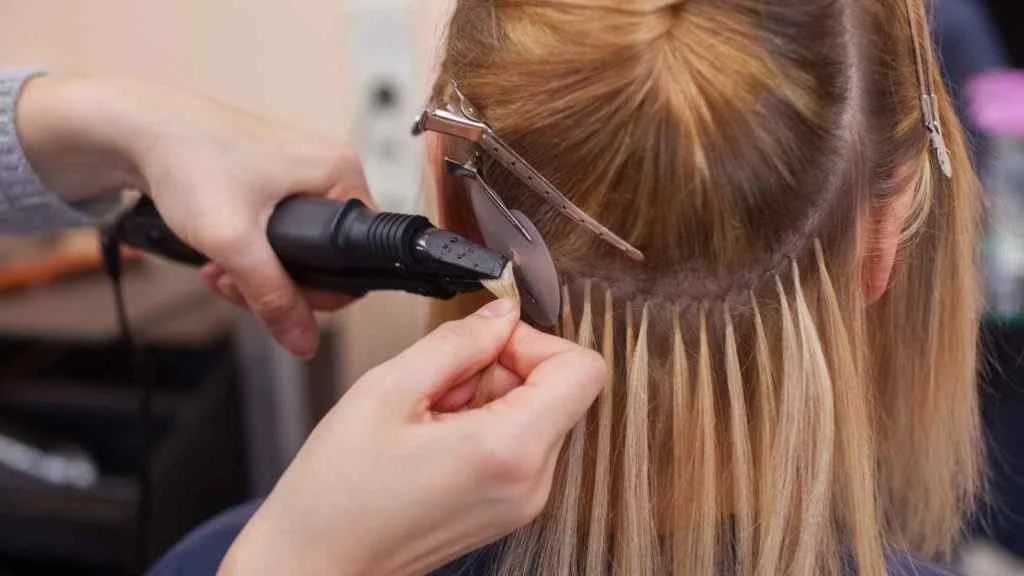
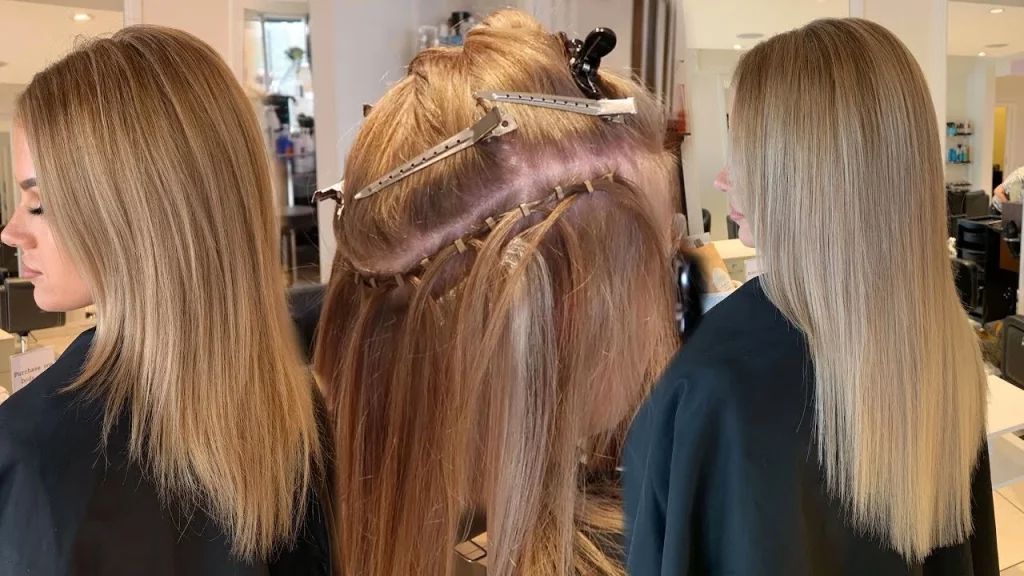
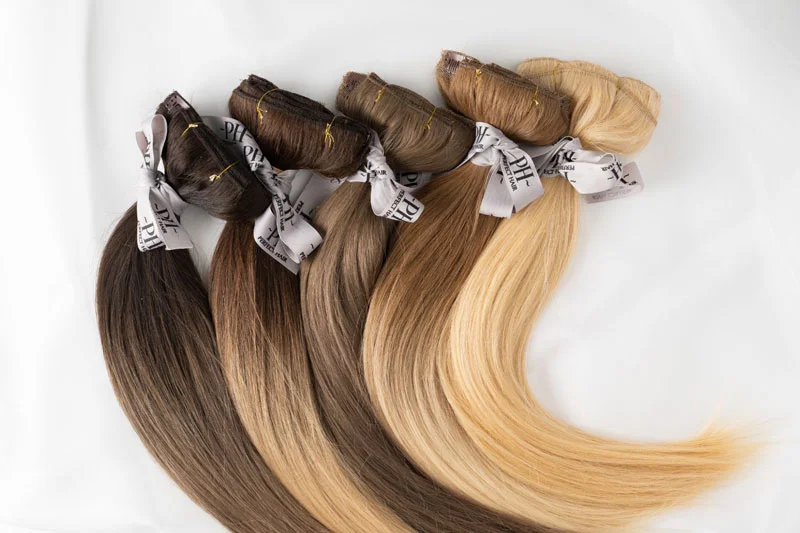
Weft hair extensions have taken the beauty world by storm, offering a versatile and effective way to enhance length, volume, and even color. Whether you’re a professional stylist looking to refine your techniques or a beauty enthusiast interested in learning more, understanding the different installation methods is key to achieving flawless results.
This guide will walk you through the types of weft hair extensions, their pros and cons, preparation steps, installation methods, and maintenance tips. By the end, you’ll have a deeper understanding of how to work with weft extensions effectively.
What Are Weft Hair Extensions?
Weft hair extensions have a long history in the beauty industry, dating back to ancient civilizations where people used wigs and extensions to adorn their hair. Fast forward to today, modern wefts are beloved for their ability to blend seamlessly with natural hair while offering customizable options for styling and length.
Unlike individual extensions, wefts come in large sections of hair that are sewn or bonded together at the top, making them versatile and reusable when installed and maintained properly.
Their rise in popularity is due to their versatility and natural appearance. Stylists love them for their adaptability, and wearers enjoy the ability to achieve different looks without damaging their natural hair.

Types of Weft Hair Extensions
Before getting into installation methods, it’s important to understand the different types of weft hair extensions available.
1. Hand-Tied Wefts
Hand-tied wefts are created by intricately sewing small bundles of hair by hand to create thin, lightweight extensions. They’re ideal for those with fine or thin hair as they add volume without adding bulk.
Pros
- Lightweight and comfortable: The material is easy to wear for long periods without causing discomfort, making it a great option for daily use.
- Lies flat against the scalp for a natural look: It seamlessly blends with your natural hair, creating a realistic appearance that’s hard to detect.
Cons
- Limited cutting options (can’t be cut to size without unraveling): The design doesn’t allow for much customizability, as trimming it may cause the material to fray or lose its integrity.
- Requires experienced stylists for installation: Proper application can be challenging and often needs a skilled stylist to achieve the best results, which might add to the overall cost.
2. Machine-Weft Extensions
Machine weft extensions are sewn together using a machine, which makes them thicker and more durable. They’re perfect for clients with thicker hair.
Pros
- Stronger and less prone to shedding: Machine-made wefts are tightly sewn, making them more durable and reducing the chances of strands falling out over time.
- Can be cut to size for a custom fit: These wefts can be easily trimmed to match the exact measurements needed, ensuring a perfect fit for different head shapes or styling needs.
Cons
- Bulkier compared to hand-tied wefts: Due to their thicker construction, machine-made wefts can feel less natural and may be harder to blend seamlessly with natural hair.
- May feel heavier for those with thin hair: The added weight of machine-made wefts can be uncomfortable, especially for individuals with fine or thin hair, potentially causing strain on the scalp.
3. Flat Wefts
Flat wefts combine the best of hand-tied and machine wefts. They’re thin but durable and can be cut to size without unraveling.
Pros
- Versatile and flexible: This material can be used in a wide range of applications, making it suitable for various design styles and needs.
- Blends easily for a seamless look: It integrates smoothly with other materials, creating a polished and cohesive finish that enhances the overall aesthetic.
Cons
- Slightly more expensive than other types: While it offers great quality, the higher price point may be a downside for those on a tight budget.
- Requires skilled installation for best results: To achieve its full potential and durability, professional installation is recommended, which could add to the overall cost.
Pros and Cons of Weft Hair Extensions
Pros
- Versatility: Weft extensions offer incredible flexibility. They can be styled, colored, and cut to match your unique preferences, making them a great choice for anyone looking to switch up their hairstyle without compromising their natural hair. Whether you want curls, waves, or sleek straight locks, weft extensions can do it all.
- Durability: When properly cared for, weft extensions can last for several months, making them a worthwhile investment. Regular cleaning, proper brushing, and occasional touch-ups can ensure they stay in great condition.
- Non-Damaging (when installed properly): With the correct installation technique, such as hand-tied or beaded wefts, your natural hair remains healthy and intact. Professional application minimizes tension and helps prevent damage or breakage.
Cons
- Upkeep: Maintaining weft extensions requires commitment. To keep them looking flawless, you’ll need regular brushing, gentle washing, and periodic maintenance appointments to adjust or tighten the extensions as your hair grows.
- Cost: High-quality weft extensions and professional installation can be pricey. Investing in good-quality extensions is important for a natural look and long-lasting results, but it may not fit everyone’s budget.
- Time-Consuming: Some installation methods, like sew-ins or hand-tied wefts, can take several hours to complete. While the results are often worth the wait, the process can be lengthy and may require scheduling additional time for maintenance or reinstallation.
Preparing for Installation
Proper preparation is key to a successful weft installation. Taking the time to prepare both the client’s natural hair and the extensions will ensure a smooth process, better results, and longer-lasting wear.
Step 1: Assess the Client’s Natural Hair
- Carefully examine the client’s hair type, texture, and volume to determine the best approach for the installation.
- Check the overall health of the hair—look for signs of damage, brittleness, or thinning.
- If the client’s hair isn’t healthy enough to support extensions, recommend a strengthening or conditioning treatment beforehand to avoid further stress on their natural hair. This may include deep conditioning, protein treatments, or a trim to remove damaged ends.
Step 2: Prep the Natural Hair
- Wash the client’s hair with a clarifying shampoo to remove any product buildup, oils, or dirt that could affect the installation or weight of the extensions.
- Follow up with a lightweight conditioner to avoid leaving heavy residue on the hair.
- Dry the hair completely, either with a blow dryer or by air-drying, and detangle thoroughly using a wide-tooth comb or detangling brush. This creates a clean, smooth base for the weft installation.
Step 3: Prep the Weft Extensions
- Before installation, wash and condition the weft extensions to ensure they are clean, soft, and free of chemicals or residues from manufacturing. Use a gentle shampoo and conditioner specifically designed for extensions to maintain their quality.
- Allow the wefts to dry completely—this can be done by air-drying or using a blow dryer on low heat. Damp extensions could lead to tangling or mold issues.
- Trim the wefts to fit the client’s head shape and desired style, if necessary. Be sure to match the length and placement to the client’s preferences for a seamless look. Preparing the wefts properly will make the installation process more efficient and ensure a natural, polished result.
Installation Methods for Weft Hair Extensions
There are several methods for installing weft extensions, each suited to different needs and preferences.
1. Sew-In Method
The sew-in method is the most traditional technique and works best for clients with thick, coarse hair.
Step-by-Step Instructions
- Create horizontal braids close to the scalp, leaving out natural hair on top for blending.
- Use a curved needle and thread to sew the weft directly onto the braids.
- Repeat the process, layer by layer, moving upward.
- Blend the natural hair over the extensions for a seamless look.
Pro Tip
Match the thread color to the weft for an invisible finish.
2. Tape-In Method
The tape-in method is great for those seeking a semi-permanent solution with minimal damage.
Step-by-Step Instructions
- Section the client’s hair into thin, horizontal layers.
- Peel off the adhesive backing from the tape extensions.
- Sandwich a thin subsection of hair between two tape wefts.
- Press firmly to secure.
Key Advantages
- Quick installation process
- Lies flat, resulting in a natural appearance
3. Glue-In Method
The glue-in method is a temporary option, best for short-term transformations.
Instructions
- Apply a thin layer of bonding glue along the weft.
- Section the hair horizontally and press the weft onto the scalp near the roots.
- Hold in place for a few seconds to ensure adhesion.
Note
Always use professional-grade adhesives and ensure proper removal to prevent damage.

Maintenance and Care
Taking proper care of weft extensions is crucial for extending their lifespan and preserving the health of the client’s natural hair. With the right routine, extensions can look flawless and last much longer.
Washing Tips
- Always use sulfate-free shampoos and conditioners, as sulfates can strip the hair of moisture and weaken the bonds or wefts, causing them to dry out or loosen.
- Wash hair gently in a downward motion, using your fingers to work the product through. This helps prevent tangling and keeps the wefts secure.
- Be mindful not to scrub too vigorously at the roots or bonds, as this can cause slippage or damage.
Styling Advice
- Limit the use of excessive heat when styling, as high temperatures can damage both the extensions and natural hair. If heat styling is necessary, always apply a heat protectant spray beforehand to minimize potential damage.
- Brush hair regularly, ideally using a wide-tooth comb or an extension-friendly brush to avoid pulling or snagging at the wefts. Start brushing from the ends and work your way up to the roots to reduce tangling.
- Avoid heavy styling products like oils or serums near the attachment points, as these can weaken the bonds over time.
Regular Maintenance
- Schedule touch-ups with your stylist every 6–8 weeks to readjust, tighten, or reinstall extensions as needed. This ensures the wefts stay secure and aligned with natural hair growth.
- During maintenance appointments, check for any signs of matting, damage, or slipping and address them promptly to prevent further issues.
- Follow your stylist’s recommendations for care and avoid DIY fixes that could compromise the quality of the extensions.
By following these tips, clients can enjoy beautiful, healthy-looking extensions while protecting their natural hair.
When Expertise Meets Beauty
Mastering the different installation methods for weft hair extensions takes practice, but the reward is always worth it—happy clients with stunning, voluminous hair that blends naturally.
Whether you’re a stylist refining your craft or a beauty blogger exploring new horizons, investing time in learning these techniques can take your skills to the next level. Remember, preparation, proper technique, and maintenance are the golden rules for success with weft extensions.
Have questions or want to share your weft hair extensions experience? Drop your thoughts in the comments below—we’d love to hear from you!

